
Drive Orders With Template First 15–30s Restaurant Menu Videos
- Abhi Bose
- 1 day ago
- 8 min read

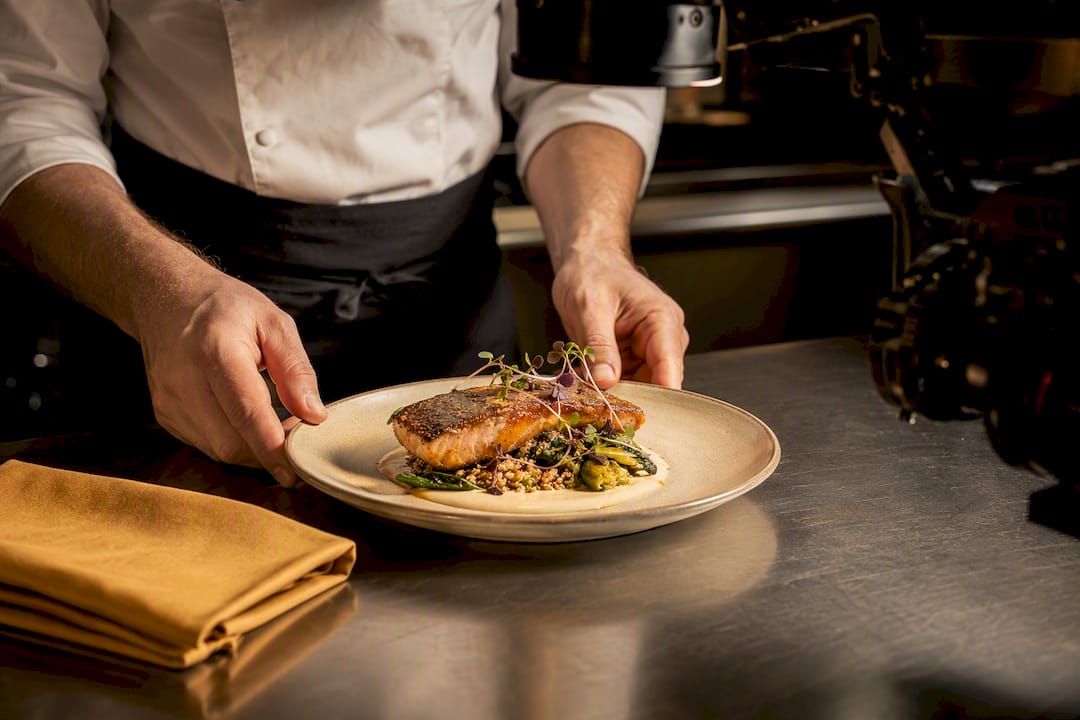
The best restaurant menu video is a 9:16 vertical clip, 15 to 30 seconds, that opens on the dish and closes on a one-tap ordering link or a visible QR code. Success looks like this: a diner watches, taps, and orders, or a passing guest spots the loop on an in-house screen and decides before they even sit down. Your next move is simple: pick a template, then map its call-to-action to your actual ordering deep link.
TL;DR:
Use vertical 9:16 videos lasting 15 to 30 seconds that open on the dish and close with a clickable order link or QR code for maximum conversions.
Shoot once at 1080x1920 and crop into square and horizontal formats, ensuring framing leaves margins for cropping without cutting off key elements.
Follow a timing structure that highlights the dish, textures, and human action within the first 20 seconds, then display the call-to-action for a final 4 seconds.
Automate the editing process with templates, auto-correction, captions, and multiple aspect ratios, and link videos directly to ordering systems using integrated platforms.
Prioritize platforms like Instagram Reels, TikTok, and delivery apps, posting between 10:30 and 11:15 AM to catch diners during decision-making, and always verify licensing and accurate descriptions.
Table of Contents
Where to Find Restaurant Menu Video Templates and Stock Footage
Which Video Formats and Aspect Ratios Should You Actually Shoot?
What Should a 15 to 30 Second Menu Video Storyboard Look Like?
What’s a Realistic Production Workflow for Daily Menu Clips?
Does This Workflow Actually Move the Needle for Restaurants?
Where to Find Restaurant Menu Video Templates and Stock Footage
You don’t need a production budget to make a restaurant video menu look sharp. You need the right starting file. A blank timeline is where most restaurant marketing plans die, so start from a template built for food.
Envato Elements runs a dedicated menu video template category with editable layers built for restaurant promos, priced for regular use if you’re producing weekly content. CapCut offers free food menu video templates that customize fast on a phone, the better pick if you’re shooting and editing on-site between shifts. Canva’s video editor gives non-designers drag-and-drop food templates with no learning curve, and it’s the easiest entry point if nobody on staff has touched Premiere or CapCut before. When you need extra b-roll to fill gaps, Pexels hosts free menu and food stock clips that work as cutaways between your own shots.
Before you commit to any template, run it through this checklist:
Editable text layers for price, dish name, and dietary flags
Placeholder clip durations that match your storyboard timing, not a generic default
Export flexibility across at least two aspect ratios
A commercial-use license confirmed on the marketplace, not assumed
Licensing terms differ across platforms, and checking the fine print on something like the Envato marketplace app before publishing saves you a takedown headache later.
Which Video Formats and Aspect Ratios Should You Actually Shoot?
Shoot once, crop three ways. That’s the entire strategy behind a sustainable restaurant video presentation workflow.
Build a 9:16 vertical master first. It’s the format Instagram Reels, TikTok, and most delivery-app listings favor, and it crops cleanly down to a 1:1 square for feed posts or up to 16:9 for your website and in-house displays. Shooting a second, separate horizontal version doubles your workload for almost no added benefit.
A few technical guardrails to keep clips fast and clean:
Export at 1080x1920 for vertical, H.264 codec, under 30 seconds runtime
Keep file size under 25MB for social upload speed and under 10MB if the clip loads on your own website
Frame the hero dish with margin on all sides so cropping to 1:1 or 16:9 doesn’t cut off the plate
One master file, three export presets. That’s how a two-person marketing team keeps a daily posting habit alive without burning out.
What Should a 15 to 30 Second Menu Video Storyboard Look Like?
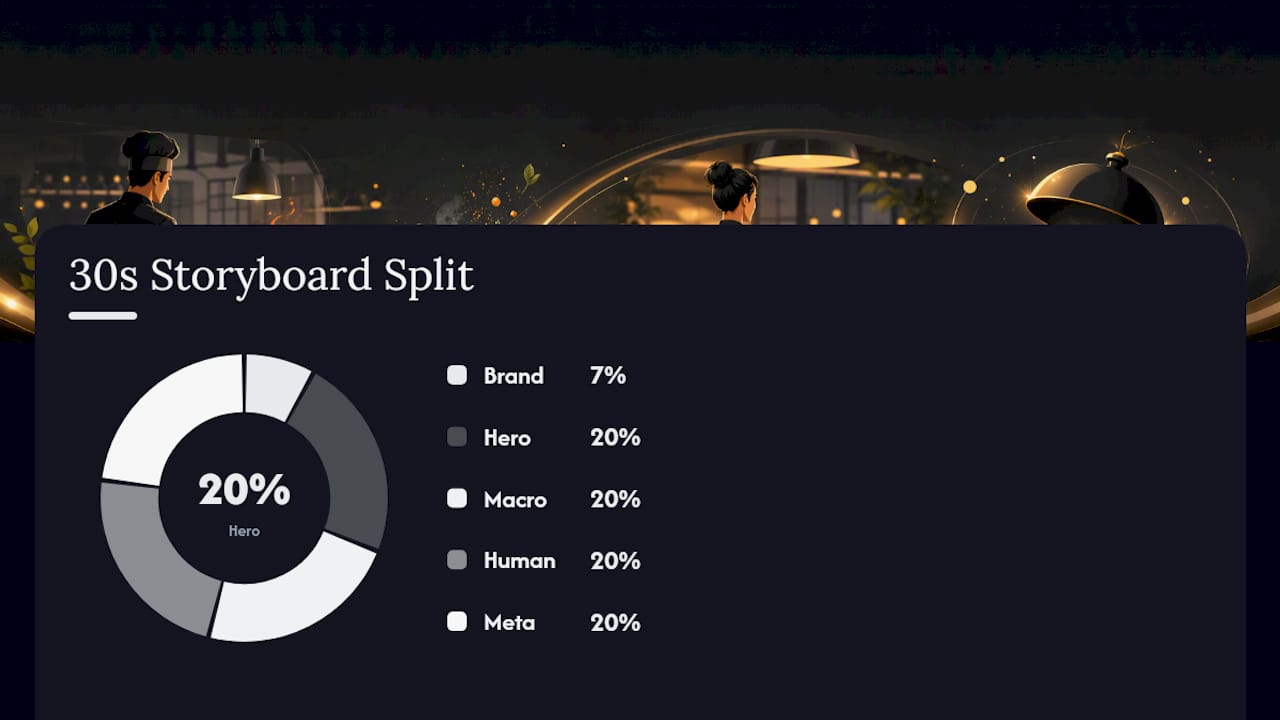
A dish-of-the-day clip lives or dies in its first two seconds. Here’s the timing breakdown that works for a full 30-second cut:
0 to 2 seconds: Brand mark or restaurant name, quick and clean
2 to 8 seconds: Hero reveal, the full plate in motion or a pour, sizzle, or garnish drop
8 to 14 seconds: Macro detail, a close crop on texture, steam, or a cross-section
14 to 20 seconds: Human interaction, hands plating, a chef’s gesture, a guest taking a bite
20 to 26 seconds: Metadata overlay, price, allergen flag, and availability window
26 to 30 seconds: Call-to-action or QR code, held on screen long enough to scan
Cutting to 15 seconds means compressing, not deleting. Merge the macro detail and human interaction beats into a single four-second segment, and trim the CTA hold to three seconds. For looping in-venue signage, design the first and last frame to match so the loop feels seamless rather than jarring on restart.
On-screen text needs its own discipline. Price and allergen flags should appear for at least three seconds, long enough to read but not so long they clutter the frame during the hero reveal. Never let text overlays sit on screen for the full clip duration. It reads as cluttered and buries the CTA.
A short-form clip in this timing structure, posted between 10:30 and 11:15 AM, tends to catch diners while they’re still deciding on lunch rather than after they’ve already ordered.
What’s a Realistic Production Workflow for Daily Menu Clips?
You don’t need a videographer on payroll. You need a repeatable fifteen-minute pipeline.
Before the camera comes out, confirm the dish is plated to standard, decide on one camera move (a slow push-in works for almost anything), get consent from any staff whose face will appear, and confirm which menu item ID the clip will link to for ordering. Skipping that last step is the single most common reason restaurant videos rack up views but never convert.
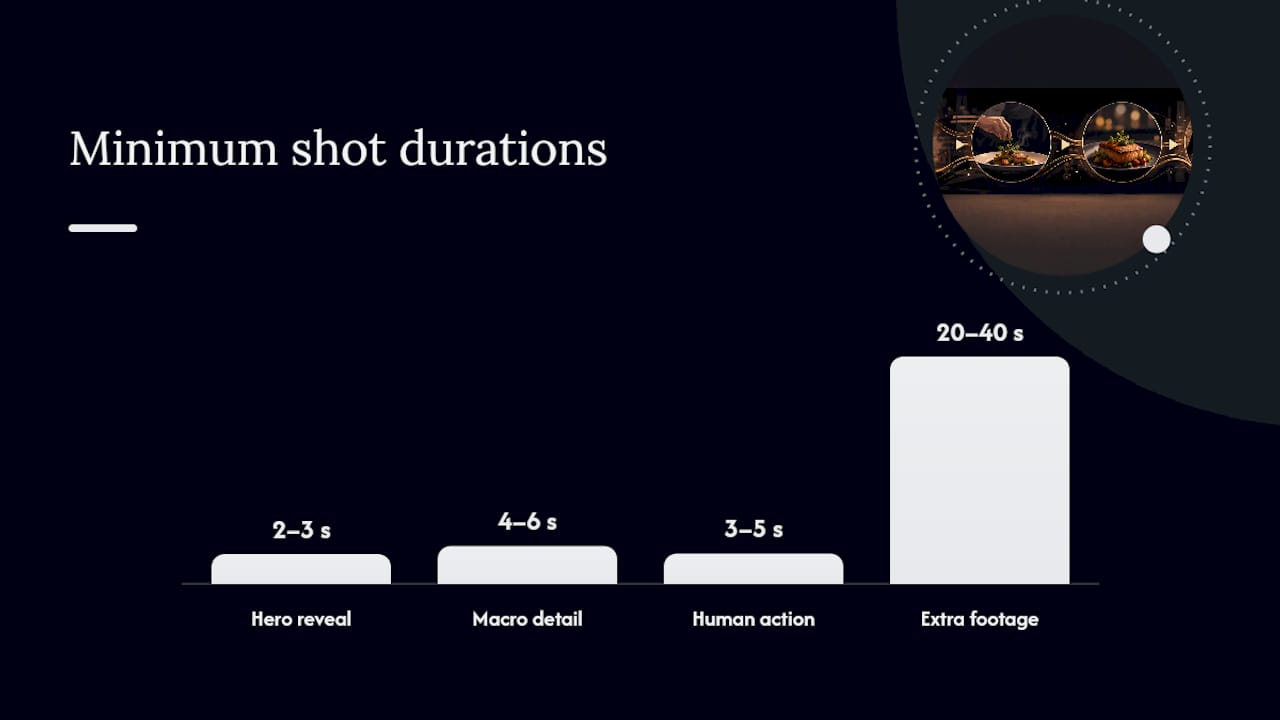
Your minimum shot list should cover a hero reveal (2 to 3 seconds), a macro detail shot (4 to 6 seconds), and a human action beat (3 to 5 seconds), plus 20 to 40 seconds of raw extra footage so you have options in the edit. Reference menu photography guidelines for lighting angles that translate well to video, since the same principles that make a still photo appetizing apply to motion.
From there:
Run auto-color correction and motion stabilization in your editor of choice
Generate auto-captions, then have a person proofread them against the actual price and allergen info
Add a short voiceover only if it doesn’t slow down the CTA reveal
Drop the final cut into your saved template and export all three aspect ratios at once
If shoot time is genuinely scarce, converting an existing approved menu photo into a short clip with an image-to-video tool is a legitimate fallback, provided a human checks the output against the real dish before it goes live.
Pro Tip: Automate the boring part. A simple Zapier or Make flow that renders your template at 8:15 AM and schedules the post for 10:45 turns a fifteen-minute manual task into something that runs itself while you handle the actual breakfast rush.
Where Should You Publish and How Should Viewers Order?
A restaurant menu video that never links to an order is just entertainment. Publish it in the places where people are actively deciding what to eat, and give every single one of them the same one-tap path to checkout.
Instagram Reels and TikTok for discovery and reach among people not yet planning to visit
Website embeds on your social or specials menu page for visitors already comparing dishes
Delivery-platform listings, where a short clip often outperforms a static photo
In-venue screens on a seamless loop, paired with a QR code that opens the identical prefilled order
For lunch specials, publishing between 10:30 and 11:15 AM catches diners before the decision window closes, and posting on a consistent daily schedule builds the habit loop that keeps followers checking back. Whether you use a deep link, a dedicated landing page, or a QR code, tag it with UTM parameters so you can trace which platform actually drove the order, not just the view. A prefilled cart link removes almost every point of friction between someone watching your video and someone paying for the dish in it.
How Do You Keep Menu Videos Accessible and Accurate?
Captions aren’t optional, and neither is honesty about what’s on the plate. Auto-captioning tools typically land around 95% accuracy in clean audio conditions, which sounds good until that missing 5% happens to be an allergen word.
Build in a human proofread step every time, no exceptions. Your on-screen label checklist should always include:
Current price, matched to what the guest will actually be charged
Availability window, especially for daily or seasonal specials
Allergen flags, visible for long enough to actually read
Never use AI enhancement to alter portion sizes, swap ingredients, or manufacture urgency that isn’t real (“only 3 left today” when that’s not true). If AI touched the footage in a way that changes how the dish appears, disclose it. Trust, once broken over a misleading video, is expensive to rebuild.
Does This Workflow Actually Move the Needle for Restaurants?
Menu design choices that lean on video, rather than static photos alone, are tied to measurable engagement uplift of up to 15% in Mydigimenu’s own design guidance for hospitality clients.
Guests spend longer on a menu page with video than one without it, and that extra dwell time is where upsell decisions actually happen.
Mydigimenu’s platform builds around exactly this behavior. QR code menus, tablet ordering, and video-supported layouts are designed to work together rather than as separate tools bolted on after the fact, with POS and delivery-platform integrations so the video’s CTA connects to a real order, not a dead end. If you’re weighing whether to pilot this, start small: one dish, one week, one measured comparison against your current static menu photos.
Templates or Bespoke: Which Deserves Your Time?
Use templated daily clips for recurring specials. They’re fast, consistent, and built to convert. Save bespoke, high-production shoots for hero storytelling moments, your anniversary, a new chef, a signature dish launch, where the extra effort pays off in brand memory rather than daily orders.
— Abhi
Bring the Whole Workflow Into One Platform
Templates and storyboards solve half the problem. The other half is what happens after someone taps play, and that’s where most restaurants lose the sale to a broken link or a menu that isn’t built to close the loop. Mydigimenu closes it by pairing QR and tablet menus with native video support and direct POS and delivery integrations, so the clip you just storyboarded lands on a menu page that can actually take the order.
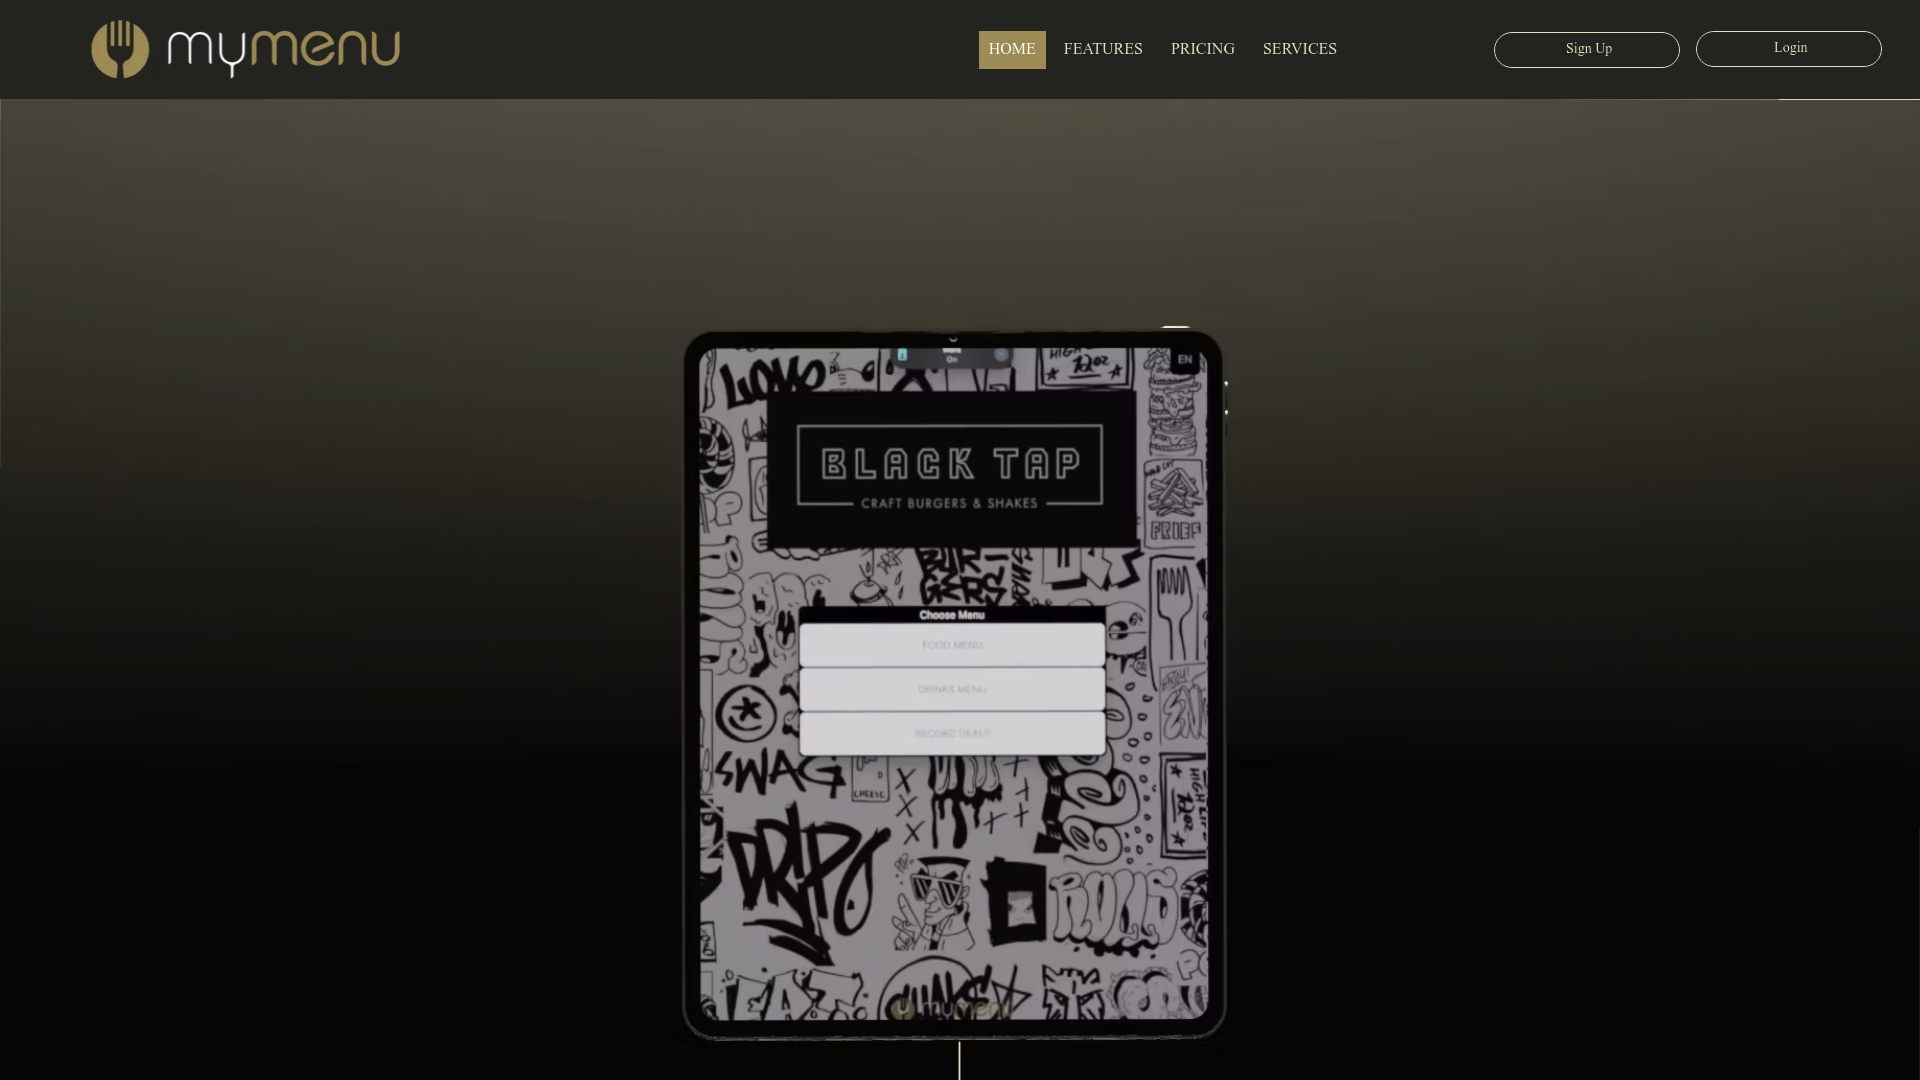
Instead of stitching together a video host, a landing page, and a separate ordering system, you drop your rendered template straight into a menu built to hold it. The QR menu generator is the fastest entry point if you’re testing table-side scanning this week, while the digital tablet and iPad menu solution fits restaurants running in-venue displays as their primary showcase. Visit either product page and request a demo to see how a finished menu video sits inside an ordering flow that’s already built to convert.
Quick Reference: Where to Get Your Next Template
Bookmark these before your next shoot day. Envato Elements works best when you need polished, editable templates across formats and don’t mind a subscription. CapCut and Canva are your free, fast options for daily specials edited between shifts. Pexels fills b-roll gaps at no cost, while a Getty-style library is worth the spend for a hero brand piece. Always confirm the commercial license and check that the template exports in the aspect ratio your shot list actually needs.
Sources
Recommended
Comments