
QR Menu Printing for Restaurants: A Print-Ready Guide

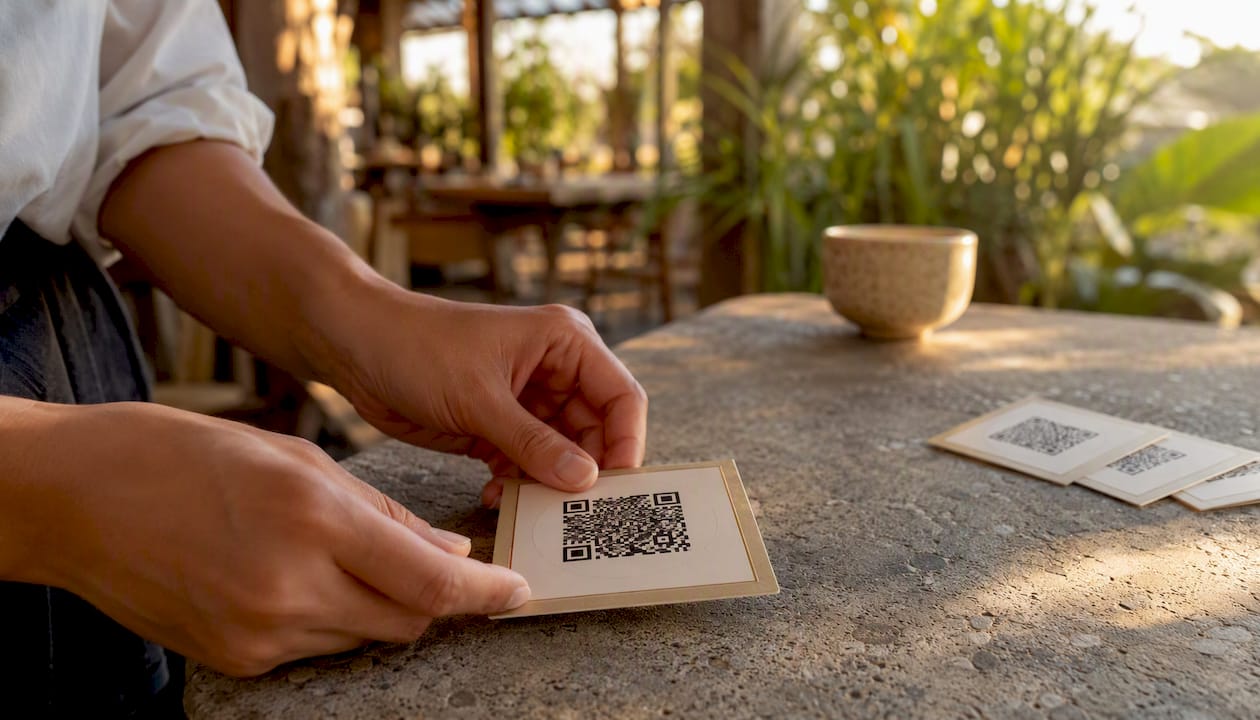
For most U.S. restaurants, the fastest path to a professional printed QR menu follows four steps: host a mobile-optimized menu page on a stable URL, generate a dynamic QR code pointing to that URL, export an SVG or PDF vector file of the code, and print on matte, durable material. That sequence keeps your menus scannable, your guests happy, and your reprint costs low.
Before you send anything to a printer, run through this 30-second checklist:
Menu host: Is the destination a mobile-friendly HTML page (not a raw PDF)?
QR type: Are you using a dynamic code so you can update the URL later without reprinting?
File format: Do you have an SVG or PDF vector export of the QR artwork?
Minimum print size: Table tents at least several centimeters wide, counter signs slightly larger, window vinyl sized appropriately for typical viewing distances.
Lamination: Matte lamination for table tents to cut glare; UV or solvent-ink finish for outdoor placements.
Scan test: Did you scan the printed proof on both an iPhone and an Android before approving the full run?
Pro Tip: Always request a dynamic QR code from your generator, and always ask your designer for the vector SVG file, not a PNG. A dynamic code lets you repoint the URL the moment your menu changes, with zero reprinting. A vector file stays razor-sharp whether it prints at 4 cm on a table tent or 30 cm on a window sign.
Key Takeaways
Printed QR menus work reliably when the hosting, code type, file format, and material choice are all aligned from the start.
Point | Details |
Use dynamic QR codes | Dynamic codes let you update your menu URL without reprinting any physical assets. |
Export vectors for print | SVG or PDF files stay sharp at any size; always request these from your designer or platform. |
Match size to scan distance | Follow the 10:1 rule: table tents need at least 4 cm, window vinyl at least 8–12 cm. |
Choose matte lamination | Matte finishes cut glare under restaurant lighting and improve scan reliability at the table. |
Mydigimenu integrates the workflow | Mydigimenu hosts the menu, manages dynamic QRs, exports print files, and tracks scans by location in one dashboard. |
Table of Contents
How do static and dynamic QR codes differ for restaurant menus?
What design rules make a QR menu fast and accessible on phones?
Which materials and finishes work best for printed QR menus?
Where should you order QR menu prints, and how long will it take?
Why do integrated platforms like Mydigimenu simplify QR menu operations?
What is the fastest workflow for QR menu printing?
Getting a printed QR menu into guests’ hands does not require a design agency or a week of back-and-forth. Four focused steps cover the whole process.
Step 1: Prepare your menu destination. Your QR code is only as good as the page it opens. Build or host a mobile-first HTML menu page, not a PDF. The page should load in under three seconds on a 4G connection, display in a single column, and use body text no smaller than 16px. If you already use a digital menu platform, that hosted URL is your destination.
Step 2: Generate a dynamic QR code. Point the code at your menu URL and configure error correction to Level H if you plan to overlay a logo. Dynamic QR codes let you update the menu file once and have every printed QR reflect the change without reprinting, which is the single biggest operational advantage over static codes.
Step 3: Export a print-ready vector. Download the QR artwork as an SVG or PDF. Confirm the quiet zone (the white border around the code) equals at least four modules on every side. Set the target size for each asset: 4 cm for table tents, 5 cm for counter signs, 8–12 cm for window vinyl.
Step 4: Order a proof, run QA, then place the full order. Never approve a full print run from a digital preview alone. Request one physical sample, scan it in your actual dining room lighting, and check it on multiple devices.
How should you host your menu for printed QR codes?
The URL your QR code points to determines how often you reprint, how well the menu reads on a phone, and whether guests can actually order from it. Three hosting approaches are common, and each has a distinct trade-off.
Hosting type | Mobile readability | Update speed | Ordering integration | Reprint risk |
Hosted HTML page (custom or CMS) | Excellent | Fast (edit live) | Possible with dev work | Low with dynamic QR |
PDF file (hosted on server) | Poor (pinch-to-zoom) | Slow (re-upload each time) | None | High |
Digital menu platform (SaaS) | Excellent | Instant | Built-in | Very low |
PDFs are the most common mistake in QR menu printing. Guides consistently recommend avoiding PDF menus for table-tent QR distribution because PDFs require pinch-and-zoom and do not reflow on phones. A guest who has to zoom in on a PDF to read your appetizers is a guest who may simply ask a server instead, defeating the purpose of the contactless setup.
A hosted HTML page solves the readability problem but requires someone to update it when the menu changes. Pair it with a dynamic QR code and you can swap the destination URL at any time without touching the printed asset.
A digital menu platform combines both advantages: the menu is already mobile-optimized, updates push instantly, and the platform typically manages the dynamic QR for you. For restaurants with rotating specials, seasonal menus, or multiple locations, a platform is the most practical long-term choice.
Decision checklist before you commit to a hosting type:
How often does your menu change (daily specials vs. quarterly updates)?
Do you need guests to place orders directly from the menu page?
Does your POS system need to connect to the menu for live inventory or pricing?
Have you tested the destination page on a real phone at arm’s length?
How do static and dynamic QR codes differ for restaurant menus?
The choice between static and dynamic codes is not a technical preference. It is a business decision with direct cost implications.
A static QR code encodes the destination URL permanently into the pattern. Change the URL and the code is useless. For a restaurant with a stable, never-changing menu page, static codes work fine. They are also appropriate for single-use promotions or printed packaging where reprinting is expected anyway.
A dynamic QR code stores a short redirect URL in the pattern. The actual destination lives in a cloud dashboard, and you can repoint it anytime. Using dynamic codes means you update the menu once and every printed QR reflects the change without a reprint. For most restaurants, that flexibility pays for itself within the first menu update.
Tracking and per-location management are the other major advantage of dynamic codes. Most dynamic QR platforms log scan counts, timestamps, and device types. If you run multiple locations, generate a separate dynamic code for each one. That way, you can see which dining room is driving the most digital menu engagement and adjust placement or signage accordingly.
Technical settings that protect scannability:
Set error correction to Level H whenever a logo or brand mark overlays the code.
Keep the logo or overlay to less than 10% of the total code area.
Maintain a contrast ratio of at least 4:1 between the dark modules and the background.
Use a short redirect URL (under 50 characters) to keep the code’s data density low and the pattern less dense, which makes scanning faster.
Pro Tip: Never use a long, parameter-heavy URL as your QR destination. Run it through a URL shortener or your dynamic QR platform’s redirect first. A simpler URL produces a less dense QR pattern, which scans faster and tolerates more physical wear.
What design rules make a QR menu fast and accessible on phones?
A QR code that scans perfectly but opens a slow, hard-to-read menu page has failed the guest. Design the menu page and the printed QR artwork together, not as separate projects.
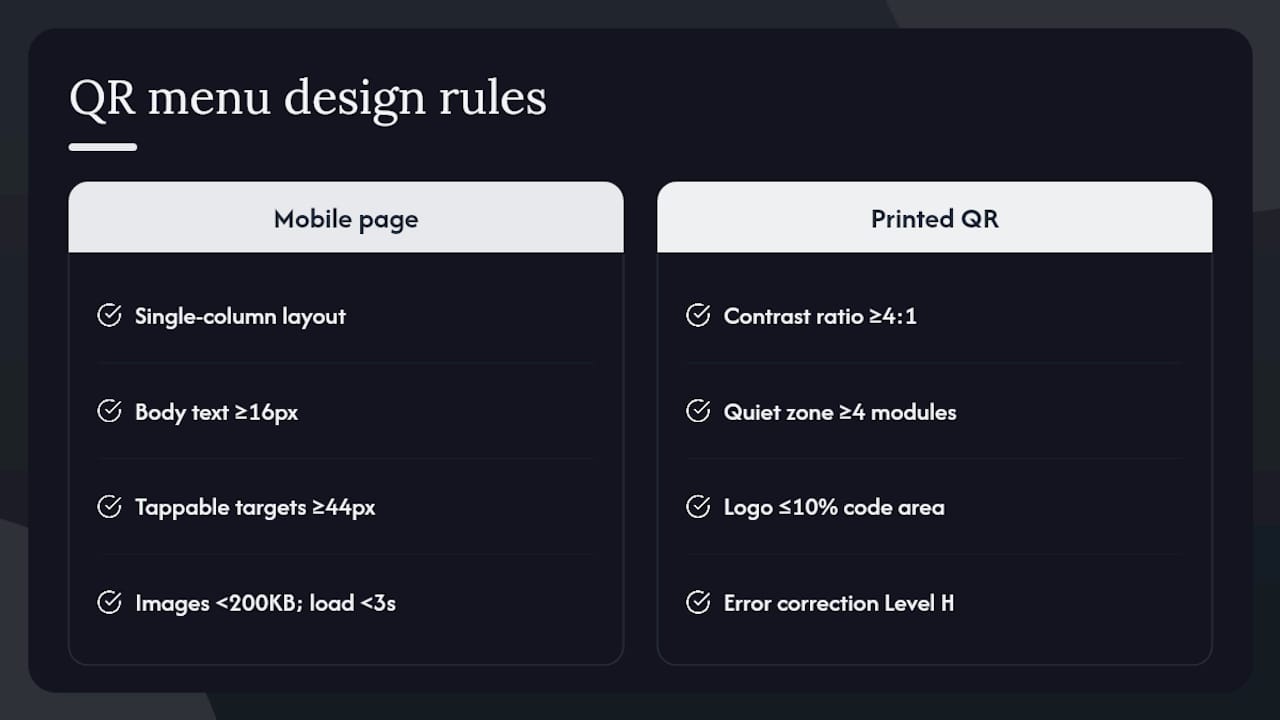
Mobile menu page rules. Use a single-column layout with section headers guests can tap to expand or scroll past. Body text should be 16px or larger. Testing confirms that body text below 16px on phones creates readability problems that drive guests back to paper. Tappable targets — buttons, category links, item names — need a minimum touch area of 44px to work reliably on all screen sizes. Compress images to under 200KB each and host on a fast CDN so the page loads in under three seconds on mobile data.
Menu content structure matters as much as visual design. Organize by clear sections (starters, mains, desserts, drinks), add allergy and dietary filters if your platform supports them, and keep item descriptions to two sentences. Guests scanning a QR code at the table are making quick decisions, not reading a novel.
QR artwork design for print. The code itself needs a contrast ratio of at least 4:1 between the dark modules and the background. Matte backgrounds reduce glare from restaurant lighting and improve scan reliability. Enforce the quiet zone: at least four modules of white space on every side of the code. If you add a logo overlay, keep it under 10% of the code area and set error correction to Level H.
Accessibility. Print a short, typed URL or branded shortlink directly on every table tent or card, below the QR code. Guests with older phones, accessibility needs, or camera reluctance can type the link instead. For the menu page itself, use semantic HTML headings and alt text on images so screen readers can navigate the content. This also supports ADA compliance considerations for digital menus in public accommodations.
What file formats and print specs do you need for QR menus?
Getting the specs right before you send files to a printer saves a round of proofs and prevents blurry codes on finished materials.
Vectors (SVG or PDF) are the correct export format for table tents and vinyl signage because they remain sharp at any size, while PNGs can pixelate when scaled. Request SVG for vinyl and large-format signage; PDF works well for table tents and laminated cards. PNG is acceptable only for small digital uses, such as email footers or social posts, never for physical print production.
For raster exports (when a printer specifically requires them), supply files at 300 DPI minimum. Use CMYK color mode for all print files. The contrast between the dark modules and the background must meet a 4:1 minimum ratio; pure black on white is the safest choice.
The 10:1 size rule governs minimum print dimensions: the code’s printed width must be at least one-tenth of the expected scan distance. A guest holding a phone 40 cm from a table tent needs a code at least 4 cm wide. A counter sign viewed from 50 cm needs at least 5 cm. Window vinyl seen from across a sidewalk (80–120 cm away) needs 8–12 cm.
Placement | Minimum code width | Expected scan distance |
Table tent | 4 cm | ~40 cm |
Counter / pickup sign | 5 cm | ~50 cm |
Window vinyl | 8–12 cm | 80–120 cm |
Takeout packaging | 3 cm | ~30 cm |
Quiet zone: four modules of clear space on every side, minimum. Never let a border, bleed, or design element intrude on the quiet zone.
Which materials and finishes work best for printed QR menus?
Material choice is where QR menu printing gets practical. The right finish for a rooftop bar is not the same as the right finish for a fast-casual counter.
Vinyl stickers: The most versatile economy option. Premium tabletop QR stickers printed on 6 mil white vinyl with outdoor-durable solvent ink and UV matte lamination offer multi-year durability for indoor and outdoor use.. Matte lamination is critical for table use; glossy finishes catch overhead lighting and make codes harder to scan.
Laminated cards: Low cost, easy to replace, and durable enough for moderate table turnover. Request UV matte lamination on both sides. These work well for cafes and casual dining where you want a clean, replaceable asset.
Acrylic discs and 3mm sheets: The premium tabletop option. Specialty printers can reverse-print artwork onto clear vinyl mounted under acrylic for a glass-like finish and added durability, paired with 3M adhesive for a secure tabletop bond. These read as high-end and hold up well in fine dining or hotel lobby settings.
Domed resin stickers: A step above standard vinyl. Domed resin table QR stickers are sold in small packs for convenient tabletop deployment… The resin dome protects the printed surface from spills and abrasion and gives a premium tactile feel.
Window vinyl: For storefronts and pickup windows. Use solvent inks rated for outdoor UV exposure. Size to at least 8 cm wide so guests can scan from the sidewalk.
For takeout packaging, confirm with your printer that inks are food-safe before applying QR stickers directly to containers or bags. For outdoor placements, UV-cured or solvent-based inks are the minimum standard; standard inkjet prints will fade within weeks in direct sunlight.
Where should you order QR menu prints, and how long will it take?
Three vendor categories cover most restaurant printing needs, and each suits a different budget and timeline.
Local digital print shops are the right call for small runs (under 50 pieces), fast turnarounds, and when you need to hand-carry a proof for approval. Most local shops can turn a table tent or laminated card order in two to three business days. The per-unit cost is higher, but the speed and the ability to review a physical proof before committing to a full run often justify it for first-time orders.
Online bulk printers (such as Vistaprint, Canva Print, or Sticker Mule for stickers) offer significantly lower per-unit pricing at quantities of 100 or more. Standard turnaround runs five to ten business days plus shipping. These vendors work well for established menus that will not change soon, and for venues that need consistent branded materials across multiple locations.
Specialty hospitality printers handle acrylic discs, domed resin stickers, and custom-shaped tabletop assets. Turnaround for specialty production typically requires multiple weeks, with minimum order quantities specified by the vendor. The per-unit cost is higher, but the durability and presentation quality are noticeably better.
Questions to ask every vendor before ordering:
What file format do you require (SVG, PDF, or print-ready PDF with bleeds)?
Do you support vector artwork for QR codes?
What lamination options are available, and is matte an option?
What adhesive type is used on stickers, and is it repositionable or permanent?
Are your inks food-safe for takeout packaging applications?
What is the minimum order quantity, and what is the proofing process?
What is the standard turnaround, and what does expedited production cost?
How do you test scannability before approving a print run?
A QR code that looks perfect on screen can fail in real dining room conditions. Test before you commit to a full order.
Pre-print digital tests:
Scan the digital QR file on a recent iPhone (iOS 16 or later) and a recent Android (Google Pixel or Samsung Galaxy) using the native camera app, no third-party scanner.
Test in your actual dining room lighting: overhead warm lighting, candlelight, and near windows with natural light.
Confirm the menu page loads in under three seconds on a mobile data connection (not Wi-Fi).
Check that body text reads clearly at arm’s length without zooming.
Physical proof tests:
Request one printed sample before approving the full run.
Test matte vs. glossy lamination by scanning under direct overhead lighting. Glossy finishes often cause glare that slows or blocks scanning.
Place the proof on your actual table surface (wood, laminate, or glass) and scan from the angle a seated guest would use.
Test at the minimum expected scan distance for each placement type.
Proof approval checklist:
[ ] URL in the QR code is correct and the redirect is active
[ ] Menu page loads and displays correctly on both iOS and Android
[ ] Text is readable at 16px or larger without zooming
[ ] Quiet zone is intact on all four sides
[ ] Error correction is set to Level H if a logo overlay is present
[ ] Matte lamination confirmed (no glare under overhead lighting)
[ ] Printed size meets the 10:1 rule for the intended scan distance
Where and how should you place printed QR menus?
Placement is where many restaurants leave adoption on the table. A well-printed QR code in the wrong spot, or with no clear instruction, gets ignored.
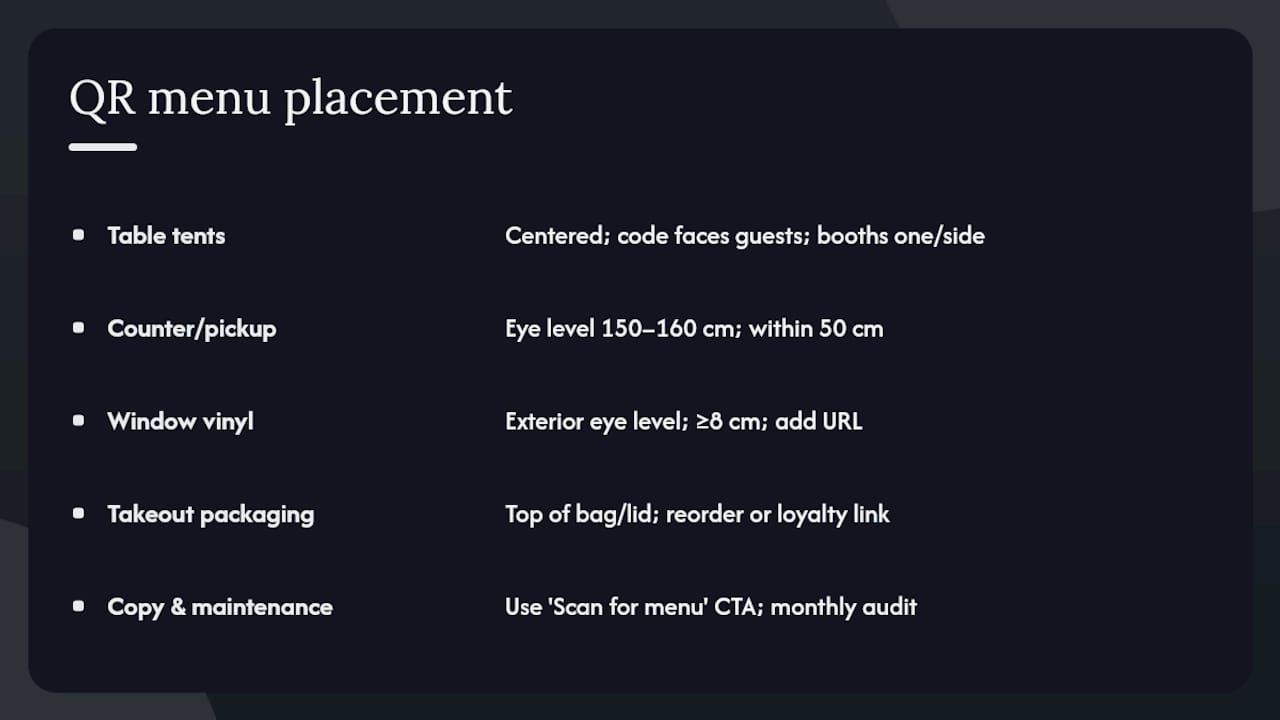
Table tents work best centered on the table, visible from every seat. Position them so the code faces the guest directly, not angled toward the server station. For booths, consider one tent per side.
Counter and pickup signage should sit at eye level for a standing adult, roughly 150–160 cm from the floor. Place the sign within 50 cm of where guests naturally pause to wait.
Window vinyl belongs at eye level on the exterior glass, visible from the sidewalk. Size it to at least 8 cm wide and pair it with a short typed URL for guests who prefer to type.
Takeout packaging placement works best on the top of a bag or the lid of a container, where guests see it when they open their order. A QR linking to a reorder page or loyalty program adds value beyond a static menu link.
Copy and labeling. Every printed QR asset needs a clear call to action. “Scan for menu” outperforms a bare QR code with no instruction. If you use multiple codes at a single venue (menu, wine list, loyalty program), label each one distinctly. A single catch-all QR that leads to a navigation page with three more choices adds friction and reduces conversions.
Hygiene and maintenance. In high-turnover venues, adhesive-backed acrylic pads or screwed acrylic mounts outlast peel-and-stick stickers by months. Replace adhesive stickers at least once a year, or sooner if edges begin to lift. Matte lamination reduces fingerprint buildup and makes surfaces easier to wipe clean between covers.
Pro Tip: Schedule a monthly QR audit: scan every code in every location and confirm the destination URL is live and the menu is current. A broken link during a dinner rush is the fastest way to lose a guest’s trust in your digital setup.
What does QR menu printing cost, and how long does it take?
Budget planning for a QR menu rollout involves three cost layers: design, printing, and platform.
Design and artwork: If you are starting from scratch, a freelance designer typically charges $50–$150 to produce a print-ready QR artwork file with your branding, quiet zone, and logo overlay. If your digital menu platform generates the QR and exports a vector file, that cost drops to zero.
Printing per unit: Laminated cards run roughly $0.50–$2.00 per piece at small-run quantities. Vinyl stickers fall in a similar range. Acrylic discs and domed resin stickers typically cost several dollars per piece depending on size and finish. Specialty die-cut shapes or custom artwork setup fees add $25–$75 per order at most vendors.
Platform costs: A dynamic QR subscription from a standalone generator typically runs $5–$20 per month. An integrated digital menu platform that includes QR management, hosting, ordering, and analytics costs more but replaces several separate tools. Mydigimenu’s pricing plans cover QR generation, hosted menus, and ordering in a single subscription.
Timeline from start to deployment:
Menu hosting setup: 1–3 days
QR generation and vector export: same day
Design and artwork finalization: 1–3 days
Print proof (local shop): 2–3 business days
Full print run (local): 3–5 business days; (online bulk): 7–10 business days plus shipping
Staff training and placement: 1 day
A realistic total from decision to tables is two to three weeks for a first-time rollout, or as little as one week if you use an integrated platform and a local printer.
Why do integrated platforms like Mydigimenu simplify QR menu operations?
Assembling a QR menu setup from separate tools (a menu builder, a QR generator, a hosting service, and an ordering system) works, but it creates four points of failure and four vendor relationships to manage. An integrated platform collapses that into one.
Mydigimenu’s QR menu platform handles hosted mobile menus, dynamic QR code generation and management, pay-at-table, POS integrations, and per-location analytics in a single dashboard. When a special changes or an allergen needs updating, one edit pushes to every printed QR instantly, with no reprint required.
For multi-location operators, per-location dynamic codes mean you can track scan volume by venue, identify which dining rooms are driving the most digital engagement, and push location-specific promotions without touching the printed assets. That kind of granular visibility is difficult to replicate with standalone tools.
Operational advantages at a glance:
Instant menu updates across all printed QRs from one dashboard
Per-location scan tracking and analytics
Built-in ordering and pay-at-table, reducing staff touchpoints
POS and delivery platform integrations that keep the menu and inventory in sync
Multi-language and multi-currency support for international guests or diverse neighborhoods
Export of print-ready QR files directly from the platform
The contactless dining workflow that Mydigimenu supports goes beyond a static menu link. Guests view, order, and pay from the same mobile session, which shortens table turns and reduces the number of server visits needed per cover. For high-volume venues, that efficiency compounds quickly across a service.
What the real world teaches you about QR menu printing
Most of the friction in a QR menu rollout does not come from the technology. It comes from decisions made before the first print run that feel minor at the time.
Glossy lamination is the most common physical mistake. It looks premium in the box, but under warm restaurant lighting, the glare makes codes difficult to scan from a natural seated angle. Every venue that switches from glossy to matte lamination reports faster scan rates without changing anything else about the setup.
Single-QR navigation pages are the most common digital mistake. A QR that opens a page asking guests to choose between “Menu,” “Wine List,” and “Order Here” adds a tap and a decision before the guest sees any food. Per-intent QRs, each labeled clearly on the table tent, remove that friction entirely.
The third lesson is about update discipline. A QR menu that points to a page with last season’s prices or a sold-out special does more damage than no digital menu at all. Weekly menu checks, ideally tied to a platform that flags stale content, keep the experience trustworthy. When high-rotation specials are in play, daily checks are worth the two minutes they take.
Mydigimenu makes the QR-to-print workflow work end to end
Running a QR menu program across a busy restaurant means managing a hosted page, a dynamic code, a print vendor, and a menu update schedule simultaneously. Mydigimenu is built to handle all of it from one place, so your team spends time on service, not on chasing broken links or coordinating reprints.
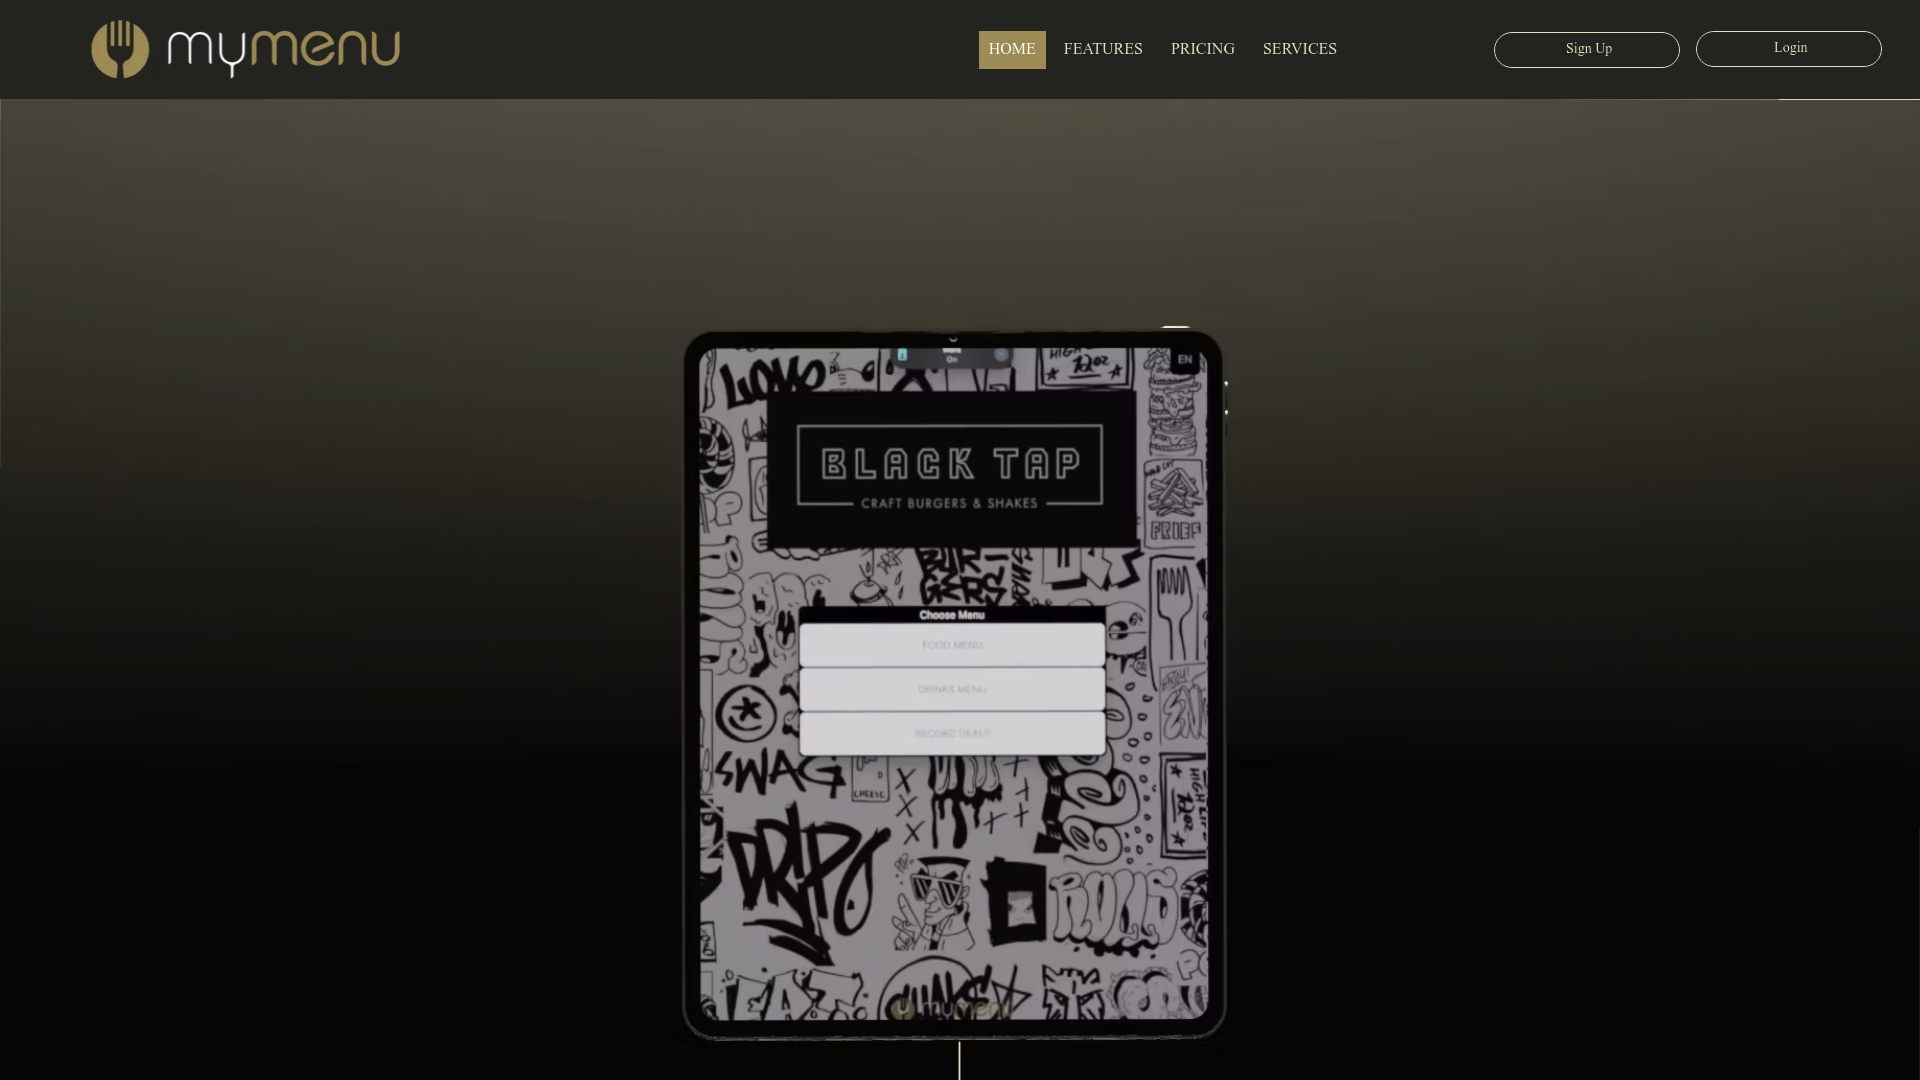
The platform hosts your mobile-optimized menu, generates and manages dynamic QR codes, and exports print-ready SVG and PDF files you can send directly to any printer. When your menu changes, one update in the dashboard pushes to every printed QR in every location instantly. Analytics show scan volume by location, so you know exactly where your digital menu is working hardest. Ordering, pay-at-table, POS integrations, and multi-language support are all included, making Mydigimenu a practical fit for single-location cafes and multi-location hotel groups alike.
Explore Mydigimenu’s QR menu features or review plans and pricing to find the tier that fits your operation. A free plan is available to get your first QR menu live today.
Sources
The sources below cover print specs, vendor options, and platform details referenced throughout this guide.
Print vendors and technical references:
Mydigimenu platform pages:
Partner resources on digital ordering and guest flows:
Recommended
Comments