
QR Code Menu Setup for Restaurants: Fast, Reliable Guide

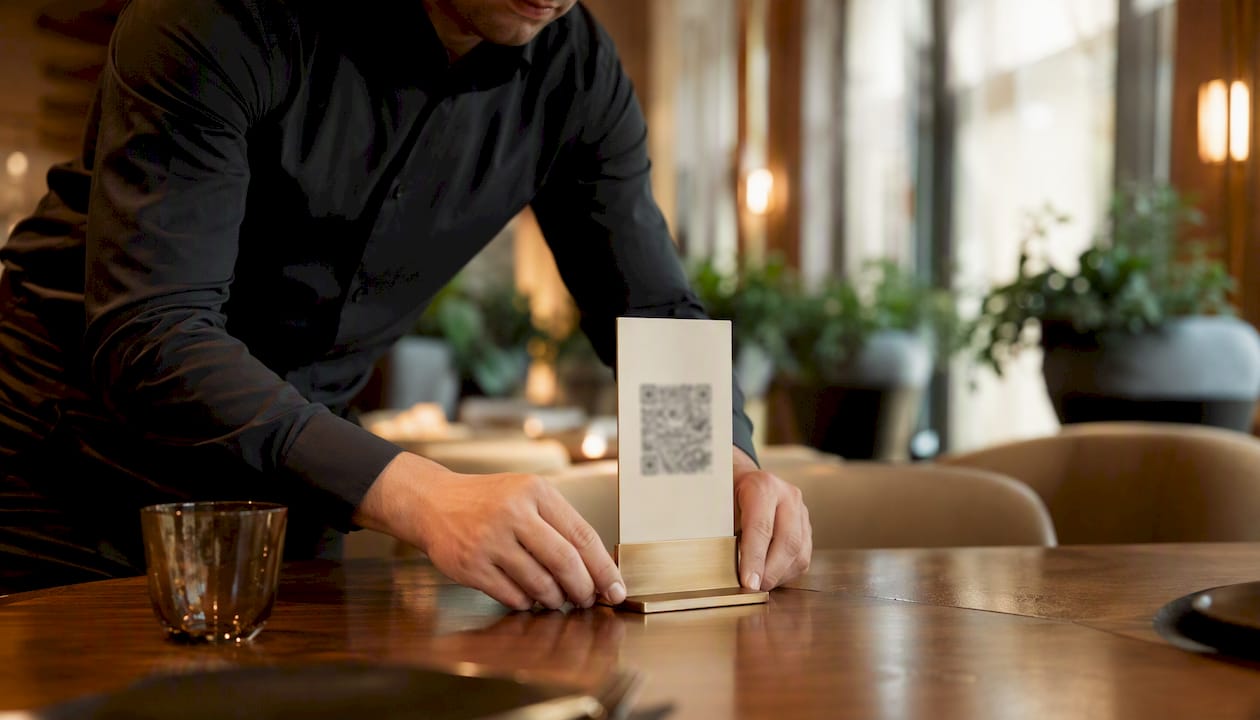
Yes — you can have a working QR code menu live in under an hour. Host a mobile-optimized menu page, create a dynamic short link, export the code as an SVG file, test it on both iOS and Android, then print and place your standees. That’s the whole path.
Here’s the compact action list you can hand to your team today:
Host your menu on a mobile-optimized web page at a URL you control (e.g., yourrestaurant.com/menu).
Create a dynamic short link that points to that page — so you can update the destination without reprinting a single code.
Generate and export the QR code as SVG for print-quality sharpness at any size.
Test on real phones — at least one iPhone and one Android — before anything goes to the printer.
Print and place table tents, window decals, or receipt codes using matte or satin stock.
Time investment: roughly 45–60 minutes for a single venue. Cost: free to minimal for a basic pilot; a branded, analytics-enabled rollout typically runs $20–$50/month on a dedicated digital menu platform. Chains can replicate the same setup per location and manage destinations centrally.
Key Takeaways
A reliable QR code menu setup requires a mobile-optimized hosted page, a dynamic short link, an SVG export for print, device testing before launch, and trained staff who can guide guests through the experience.
Point | Details |
Host on your own domain | A /menu page you control lets you update content instantly without reprinting codes. |
Use dynamic short links | One redirect per placement preserves every printed code if your menu platform ever changes. |
Export QR codes as SVG | SVG scales to any print size without pixelation; never use JPG for printed codes. |
Test on real devices and real lighting | Scan from seating distance on both iOS and Android before ordering a full print run. |
Mydigimenu unifies the stack | Mobile hosting, dynamic QR, POS integration, and pay-at-table in one platform built for hospitality. |
Table of Contents
How to set up your QR code menu step by step
The sequence below moves from content prep through deployment. Each phase has a clear owner so you can assign tasks before the morning rush.
Step 1: Decide your destination and who owns it
Before generating a single QR code, settle on where guests will land. A mobile-optimized web page on your own domain is the strongest long-term choice. A temporary Google Doc or a shared PDF works for a same-day pilot but carries real fragility — shared-drive links expire, and PDFs force guests to pinch and zoom on small screens. Your front-of-house manager or a tech-comfortable team member should own the destination URL from day one.
Step 2: Build or convert your menu content
Gather your current menu in a single document. Strip out any layout that won’t translate to mobile: multi-column tables, tiny fonts, and image-heavy PDFs all create friction. Write concise item descriptions (under 20 words each), add clear section headings (Starters, Mains, Drinks), and confirm pricing is current. If you’re converting an existing PDF, use your browser’s save-as-PDF function to produce a clean, browser-renderable file — but treat this as a temporary bridge, not a permanent solution.
Step 3: Host the menu and create a dynamic short link
Upload your menu page or file to your domain. Then create a dynamic short link — a redirect URL like yourrestaurant.com/menu-qr — that points to the hosted page. The redirect is the key move: if you ever change your menu platform, update the redirect and every printed code in the building still works. Using a branded short link per placement (table, window, receipt) also lets you capture placement-level analytics without reprinting different codes later. Add UTM parameters to each destination URL (e.g., ?utm_source=table&utm_medium=qr) so your analytics dashboard shows which location drives the most scans.
Step 4: Generate and export the QR code
Use a QR generator that supports dynamic codes and SVG export. Enter your short link as the destination. Adobe recommends exporting QR codes as SVG for print — SVG scales to any size without pixelation, which matters when a printer scales your file up for a window decal. For digital use (email, website), a high-resolution PNG at 300 dpi is acceptable. Never save a QR code as JPG: compression artifacts corrupt the fine modules that phone cameras need to decode the pattern.
Step 5: Print proofs and deploy
Print one proof at actual size before ordering a full run. Scan it with both phone types, in the lighting conditions of your dining room. Once it passes, order your table tents, stickers, or signage. Place codes at every table, on the front door, and at the bar. Brief your team on the short URL fallback — guests who can’t scan can type it directly.
Which menu hosting option is right for your venue?
Choosing where to host your menu shapes everything downstream: update speed, guest experience, and long-term cost. Three tiers cover most venues.
Quick-share document (Google Doc, Notion page, or shared PDF link)
Fastest to set up — under 10 minutes.
Zero hosting cost.
Fragile: shared-drive links can expire or require sign-in; PDFs force pinch-and-zoom on mobile, frustrating guests on older phones and slow connections.
Best for: same-day pilots, pop-ups, or single-event use where you’ll replace the setup within a week.
Mobile-optimized page on your own domain (/menu)
Best balance of control, guest experience, and cost.
Updates take seconds — change the page, and every printed code reflects it instantly via the dynamic redirect.
Supports images, video, dietary tags, and accessibility features that PDFs cannot.
Best for: permanent installations, full-service restaurants, cafes, and any venue running more than one location.
POS-integrated ordering page
Highest operational value: guests order and pay directly from the QR scan, orders route to the kitchen, and the check closes without staff intervention.
Requires POS vendor support and usually a subscription or per-transaction fee.
Best for: counter-service venues, high-volume cafes, and full-service restaurants ready for pay-at-table.
If you must use a PDF, host it on your own domain rather than a third-party share link, keep the file under 2–3 MB, and configure it to open in the browser rather than trigger a download. That single change cuts mobile load time noticeably.
Pro Tip: Start with a mobile HTML page even if it’s a simple one-page site. The flexibility you gain — instant updates, analytics, accessibility — far outweighs the extra hour of setup compared to a PDF.
What makes a mobile menu actually usable for guests?
A QR code that scans perfectly but lands on a cluttered, unreadable page loses the guest immediately. Mobile UX is where most first-time setups fall short.
Layout and legibility
Single-column flow only — no side-by-side columns on a 375px screen.
Body text at 16px minimum; section headings at 20px or larger.
Item descriptions under 20 words; price right-aligned or on its own line.
Clear visual separation between menu sections (a colored divider or extra whitespace works).
Accessibility musts
Use real HTML text, not images of text — screen readers cannot parse a JPG of your menu.
Add descriptive alt attributes to every food photo (“Grilled salmon with lemon butter and asparagus”).
Verify the page is navigable by keyboard for guests with motor impairments.
Always keep printed menus available on request — accessibility law in the United States requires reasonable accommodation, and a digital-only policy can create liability.
Design consistency
Match your brand colors and logo to the digital menu so guests feel the same identity they saw on the door.
Use menu layout principles that guide the eye toward high-margin items: position them at the top of a section or highlight them with a brief callout.
Compress food photos to under 200 KB each — beautiful images that take four seconds to load do more harm than good.
Pro Tip: Test your menu page on a three-year-old Android phone on LTE, not just your own flagship device. If it loads cleanly and reads well there, it will work for virtually every guest.
QR code technical specs that prevent scan failures
Getting the technical details right is what separates a code that works every time from one that fails under dim restaurant lighting or on an older camera app.
Dynamic vs. static codes
Dynamic QR codes store a short redirect URL in the pattern rather than the full destination. That means you can update the destination after printing — no new codes, no reprinting. Static codes bake the full URL directly into the pattern; if that URL ever changes or breaks, every printed code becomes a dead end. For any permanent installation, dynamic codes are the only sensible choice.
File format guide
Format | Best use | Notes |
SVG | Print (table tents, signage, decals) | Scales to any size without quality loss |
PNG (300 dpi+) | Digital (email, website, social) | Fixed resolution; fine for screen use |
JPG | Avoid entirely | Compression artifacts degrade module edges |
Print size and scan distance
Placement | Minimum code size | Comfortable scan distance |
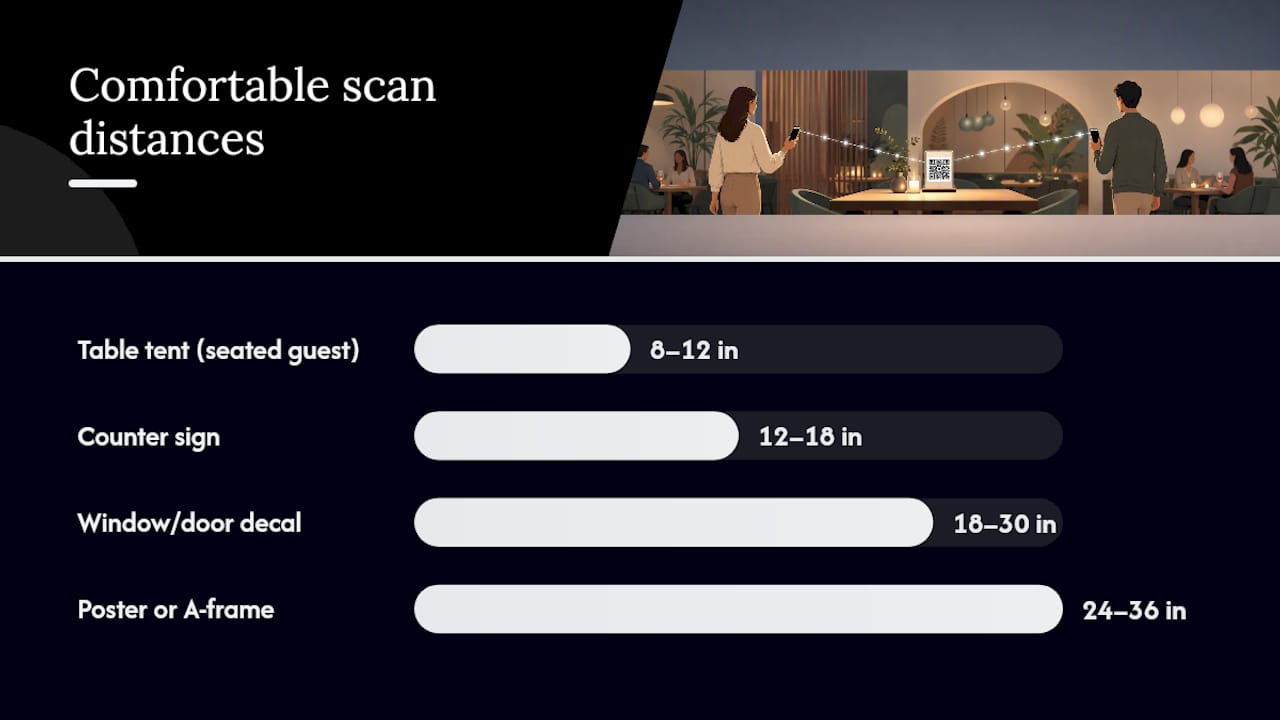
Table tent (seated guest) | 1.5 in × 1.5 in | 8–12 inches |
Counter sign | 2 in × 2 in | 12–18 inches |
Window/door decal | 3 in × 3 in | 18–30 inches |
Poster or A-frame | 4 in × 4 in | 24–36 inches |
Quiet zone: Leave a blank margin of at least 4 modules on every side of the code. Printing a code edge-to-edge — right to the border of a sticker or card — causes intermittent scan failures across phone models.
Error correction: Set error correction to level H (30% redundancy) when embedding a logo.
Pro Tip: Print one proof and scan it in your actual dining room at the end of a dinner service — low light, ambient noise, and a tired camera app are the real test conditions, not your bright office.
Where and how to place printed QR codes
Placement determines whether guests actually scan. A technically perfect code placed at the wrong height or on a glossy surface will underperform a simpler one placed well.
Highest-impact placements
Table tent at each seat: The single highest-converting placement. Guests see it the moment they sit down, before they’ve asked for a menu.
Front door or window decal: Captures guests before they enter and sets expectations for a contactless experience.
Bar top or counter: Drives drink orders and add-ons during wait times.
Receipt or takeout bag: Brings guests back — link this code to your loyalty program or a feedback page rather than the standard menu.
Materials and finish
Matte or satin laminate for all indoor table assets — gloss creates glare under restaurant lighting that kills scanability.
Waterproof or UV-resistant stock for outdoor patios and window decals.
Acrylic or brushed metal standees for fine-dining settings where paper tents feel out of place.
Security note: Inspect table tents weekly for tampered or covered codes. A sticker placed over your QR code by a bad actor redirects guests to a malicious site. Dynamic codes let you monitor scan traffic — an unusual spike or drop in scans from a specific table is a signal worth investigating.
Placement | Recommended size | Material |
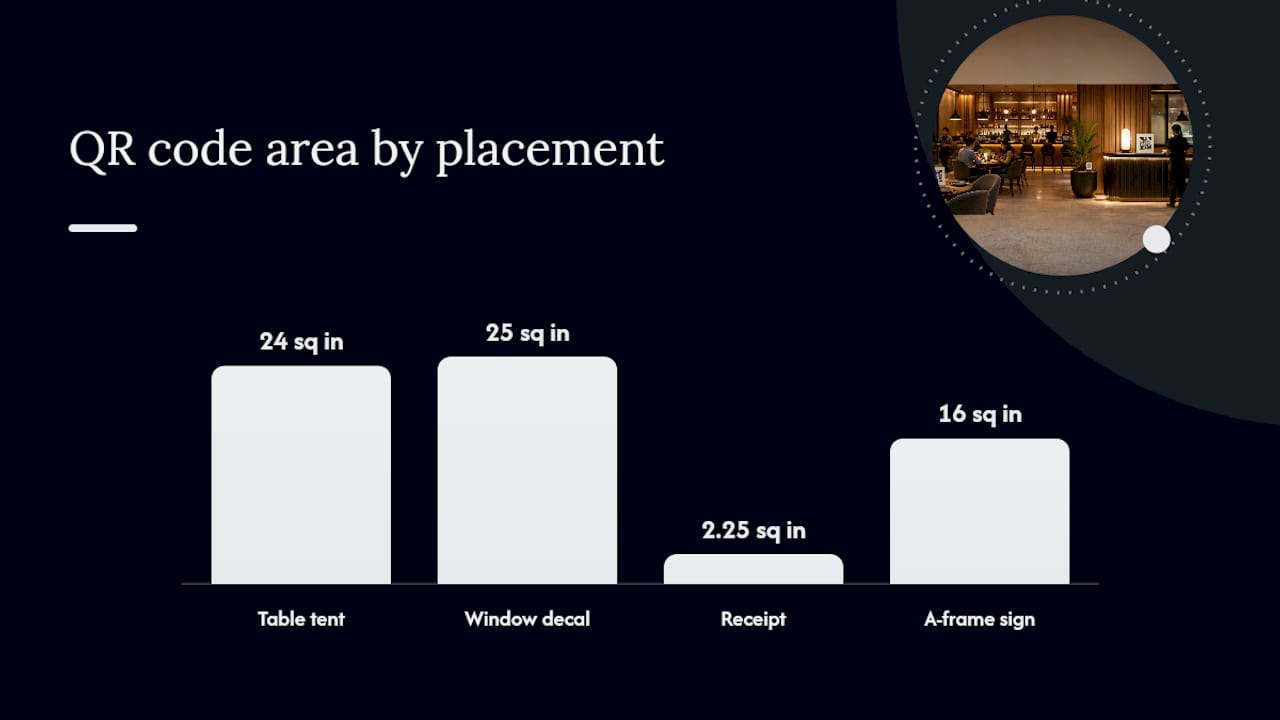
Table tent | 4 in × 6 in card | Matte or satin laminate |
Window decal | 5 in × 5 in | Vinyl, UV-resistant |
Receipt | 1.5 in × 1.5 in | Standard thermal print |
A-frame sign | 4 in × 4 in code | Weatherproof board |
Connecting your QR menu to ordering and payment systems
A QR code that only shows a menu is a good start. One that lets guests order and pay without flagging down a server is a genuine operational upgrade.
Three integration models
Link-only (menu display): The QR points to a read-only menu page. No ordering, no payment. Lowest cost and complexity; best for venues where staff still take orders verbally.
Ordering-only (order page): Guests browse and submit orders via the QR link; orders route to a kitchen display or printer. Payment still happens at the counter or with a server. Works well for counter-service cafes and fast-casual spots.
Full POS integration (order + pay): Guests order and pay entirely through the QR flow. Orders route directly to the POS and kitchen. Staff focus on food delivery and hospitality rather than order-taking. This model suits high-volume full-service restaurants and is where online ordering integration delivers the clearest return.
Questions to ask any vendor before committing
Does the platform own the guest order data, or do you?
What are the per-transaction fees, and do they apply to in-house orders as well as delivery?
How does the refund flow work — does staff need to log into a separate portal?
What POS systems does it integrate with natively, and what requires a middleware layer?
Can you export guest data (emails, order history) if you switch platforms?
Two quick workflow examples
Counter-service cafe: Guest scans table code → browses menu → submits order → receives order number → picks up at bar. Staff see orders on a kitchen display. No server interaction required for the order itself.
Full-service pay-at-table: Guest scans code → browses and orders → server confirms and delivers food → guest pays via QR at the end of the meal. The POS closes the check automatically. Table turns faster because guests don’t wait for a check to be printed and returned.
Pre-launch QA and staff training checklist
Running a structured QA pass the day before launch catches the failures that matter most.
Device and network testing
Print one proof at final size and scan with the native camera app on a current iPhone and a mid-range Android device.
Test from the actual seating distance in your dining room, not from 6 inches away at a desk.
Switch your test phone to LTE (turn off Wi-Fi) and confirm the menu page loads in under 3 seconds.
Test on an older device (3–4 years old) — camera autofocus and processing speed vary significantly.
Confirm the short URL fallback works by typing it directly into a browser — guests who can’t scan need this path.
Verify all menu sections load correctly, images display, and prices are current.
Staff training
Show every frontline team member how to scan the code themselves so they can demonstrate it to guests.
Agree on a single phrase for offering help: “You can scan the code on your table, or I can bring you a printed menu.”
Designate one person per shift as the “menu owner” who knows how to update content and who to call if the link breaks.
Keep a small stack of printed menus behind the host stand — never leave guests stranded.
Post-launch monitoring
Check scan analytics after the first three days. A sudden drop in scans from a specific table usually means a damaged or covered code. A consistently low scan rate from window codes may indicate poor placement height or a glare problem. Adjust in the first week while impressions are fresh.
Why the setup matters more than the technology
Mydigimenu covers the full checklist in one platform
Running a QR code menu setup across multiple tools — a separate menu builder, a link shortener, a QR generator, and a POS integration — adds cost and creates points of failure. Mydigimenu brings all of it into one place, purpose-built for hospitality.
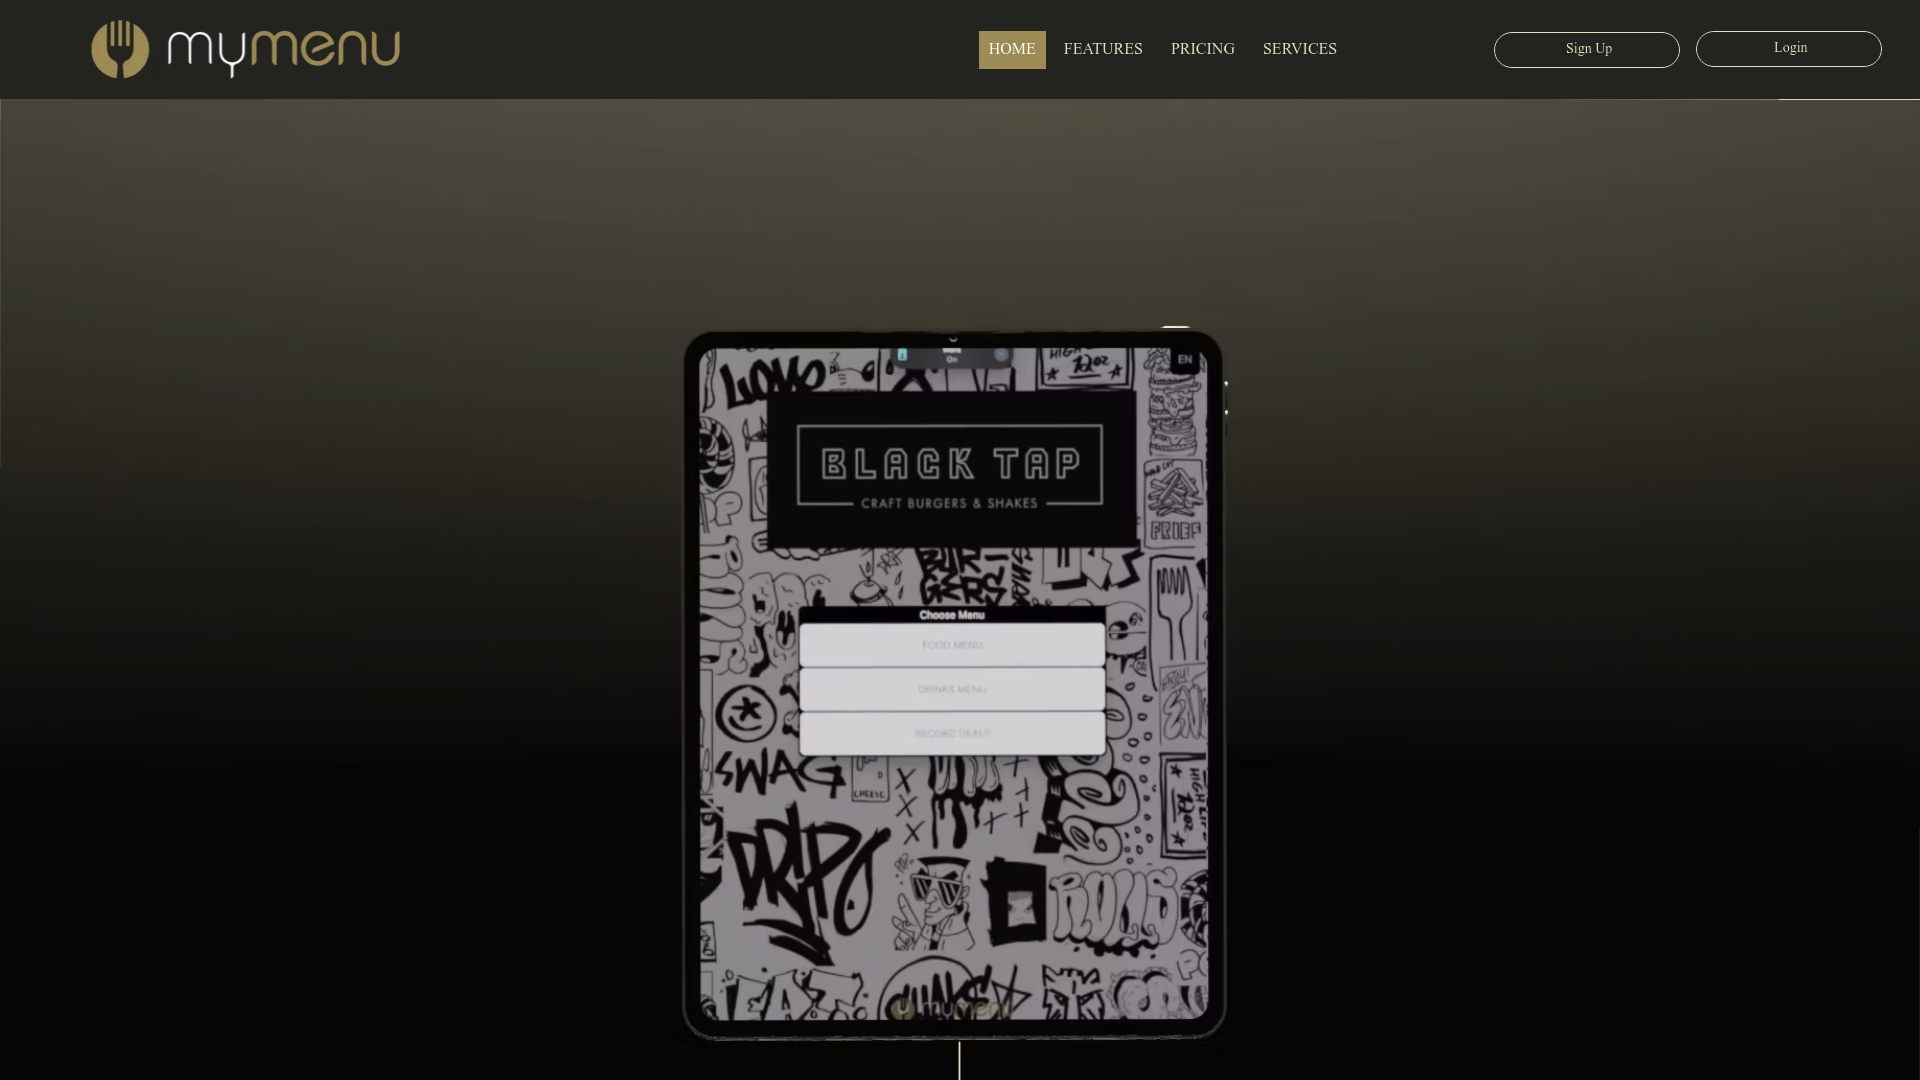
The platform handles mobile menu hosting and dynamic QR short links natively, exports print-ready assets, and connects directly to POS systems and payment gateways for full pay-at-table ordering. Rich food videos, multilingual menus, loyalty programs, and CRM integration come standard — so the same setup that gets your menu live also captures guest data and drives repeat visits. For managers evaluating cost, pricing plans cover single venues through multi-site rollouts, with no per-order fees on in-house dining. Start with a free trial or request a demo at Mydigimenu to see how the platform maps to your specific operation.
Sources
Recommended
Comments